6. Build your first automations

6. Build your first automations

 • 3 min read 

Play Video
On this page

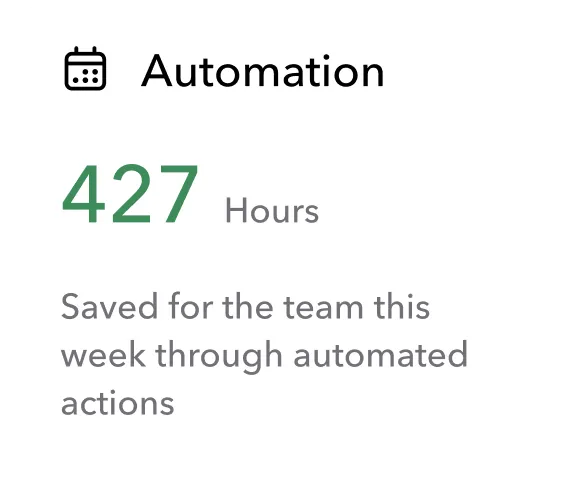
Today, we’re going to be looking at the Workflow Builder. We’ll build a couple of workflows together so that you know the basics and can start automating your workflow processes on your home dashboard. Now you have a great automation report at the bottom, which lets you know how much time is being saved using automated workflows.

From the settings menu, you can open up the Automation Builder. Here, you can view templates. So let’s go ahead and grab a template.

Every automation is made up of three parts: a trigger, a condition, and an action. Let’s take this basic welcome message and modify it a little bit. Here, we can see the trigger is when a user is created. But let’s add a condition and filter it to only occur when the access group is the onboarding access group. In the action, which is an email, let’s go ahead and modify the message. As you can see here, we can add personalization variables to make the message more dynamic.

Now let’s take a look at the Manage tab, where we can see all of our automations. Here, we can see the automation we just created. To delete it, you can use the buttons in the upper right to deactivate or completely delete.

Let’s take a look at this automation, which triggers off when a user claims a shift. There are many triggers available to you, including when data is created, updated, or deleted, when a user takes a specific action, or even based on scheduled times like when a shift is scheduled to start or when a break is scheduled to end.

Now, let’s create a new automation together. This automation will trigger off a date, specifically a document expiration date. So, we’ll say when a scheduled time is reached, and that scheduled time will be the document expiration date. We can then use the timing modifier to set a specific number of minutes or days.

Finally, let’s set up the action. In this case, we want to notify both the owner of that document and some admins about the upcoming expiration. We can set a subject line and even a reply-to address so that when the staff replies to the email, it goes to the correct user. Again, we can use personalization variables from the document itself or from any linked data. Let’s add another action by clicking the “Add Action” button. Instead of sending based on the owner of the document or the person who submitted it, we’re going to target a specific email. To do that, we can select the dropdown next to “Send To” and select “Emails,” then type in a specific email or multiple emails. Don’t forget to hit enter and see the tag format show. To remove, hit the tiny X.

Let’s update this message and save this automation. Once saved, we can now see our automation in our active automation section. We can even see icons that show what’s happening in each automation. Here, you see at a scheduled time, we send two messages.

When you think about automations, you can think about any logic that you use in your day-to-day process. When X happens, you need to do Y. So start thinking with automations today. When an employee joins, what are the emails, what are the texts, and what data updates are being made? Build automations for those to save yourself time. For example, when a document is uploaded by a staff member, you may want to be notified. How might you build that automation? To do so, you would choose the trigger “When something is updated” and select the document file.

Now let’s build a very simple but very powerful automation that triggers off a dropdown in the tool. First, let’s create the dropdown on the user table. Let’s add a column called “Actions.” This will be a single select. Let’s create two options in that dropdown: one called “Send Invite” and another called “Invite Sent.” We can even color code these to more accurately reflect the status.

Now, let’s create an automation that triggers off that dropdown. First, we’ll give it a name by clicking in the top left. We can highlight the name value and update it. We’re going to select the trigger “When something is updated” and select the user table and the action column we just created. For the conditions, we’re going to make sure that the action is now being selected to “Send Invite.” This means that whenever someone updates this column and they update it to “Send Invite,” this automation will run.

For the actions, we want to send a text and maybe an email as well. So first, let’s write the text and include the link to download the app. We can also include the email, which will be needed to register their account. We may also want to give confirmation that the automation ran. So in this case, let’s modify that “Actions” column to “Invite Sent.”

So let’s take a look at this automation. When a user action column is updated, if that action is updated to “Send Invite,” we’re going to go ahead and send a text and modify that column to “Invite Sent” to let us know that it ran. And before we forget, let’s also create an email action. We can copy and paste the message from above, and that’s looking good. Let’s go ahead and save that.

Now, let’s go test it out. Back on the user table, let’s go ahead and test this automation out. So now let’s select “Send Invite.” Instantly, that’s converted to “Invite Sent.” And now, when we open the activity history, we can see the two messages that were sent for that user. Note: No text was sent because there’s no phone number on this user’s profile. Here’s a quick preview of what that email looked like. To customize the images shown here, just go to your settings and basic details. You can also see the automation has run by going back to the automation section and clicking on the number of runs in the top right.

So just to recap, we created a number of automations today. First, we set up a basic trigger when a user was created. Second, we created an automation triggering off a document expiration. And third, we created an automation based on a user action, like modifying a dropdown.

Check out more advanced automation tutorials in our Teambridge Academy Library. Thanks for joining this Team Bridge Academy tutorial. Keep building, keep improving the process, and have fun! We’ll see you on the next Team Bridge Academy video.

Join the TeamBridge revolution

Getting tired of repetitive work holding you back from your next stage of growth? We can help!

Schedule a demoSchedule a demo

Next in the series / related tutorials

Getting Started

3 min read 

3 min read 

Getting Started

3 min read